 Limit Consulting
Add invoice. Quipu makes the process of creating a new invoice very intuitive. It also saves you from having to do the same task twice by remembering your data and displaying them the next time. The more you use it the easier and quicker it gets.
![]()
You can issue a new invoice from the ‘Overview’ Screen, click on “+Issue an invoice”.
![]()
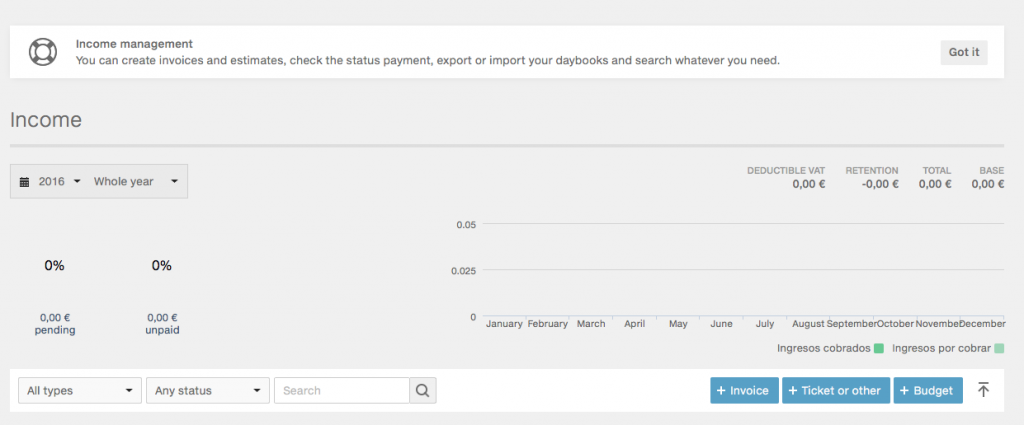
or from the ‘Income’ Screen by clicking on “+Invoice” ,
Once you are on the ‘Create Invoice’ Screen you will be asked to input straightforward information.
To Learn about what sort of information should go in a legal invoice read our post:
Invoices. How to make them. What to include.
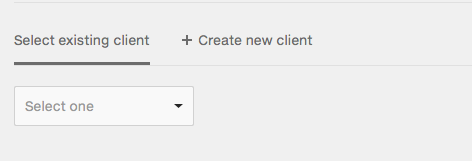
You can Select existing clients or create a new one.
You can do the same with products, items or services. Once created it will be available for future invoices.
When you finish, click on ‘Create’. The application will take you to the income screen where you can perform some actions on existing invoices, such as editing or send via email.
If you plan to do new invoices, just tick the box ‘Would you like to create another invoice?’ and you will be taken back to the ‘Create invoice’ page.

Check more articles and videos:
